Sunday, August 4, 2013

DIY: Preppy Binder Covers


Hey Everyone!  Are you ready to take those boring binders and make them the envy of all of your friends!  Lets get started! (Below I will post a picture of some of the ones I made)

The great thing about these binder covers if that you can personalize them however you want!  And make them according to your own style!  

Step 1.  
Go to google and search for things like (or use the ones I have listed below)
- Lilly Pulitzer Patterns
- Lee Jofa Patterns
- Preppy Patterns/Backgrounds
- Vineyard Vines Patterns
- Floral Patterns
- Pink Argyle Patterns
- etc.

Step 2.  
Open up Word or Pages (I used Pages)
- Make sure you have a blank page
- Insert the first pattern you want to use
- Open up The Inspector
Go to the tab Wrap
- Make sure that your photo is NOT creating a Wrap
- Adjust your first photo to whatever size you want the pattern to be and place the first on in the left corner

* Repeat this so that it looks like a continuing pattern all over the entire paper (even the middle)
* You might occasionally leave some blank in the middle if you have problems with your patterns (but you will later cover it with a box)

Step 3. 
Your page should be completely filled with your pattern.  
- On the top there should be a button that says Shapes
- Click a square 
- Make the square white (or another corresponding color if you want)  make sure to also make the border white (or another color for a thin border effect)
- Stretch out the white box so that it is a rectangle stretched across your page 

Step 4. 
Now you should have a pattern on the paper and a completely white box
- Go to Shapes again and get another square 
- Make the square whatever color you want the border to be
- Stretch out the rectangle so that it is somewhat thin and put it along the bottom of your white box
- Repeat this for the top border piece

Step 5. 
Make sure you have your pattern down, your white box, and your border on the box
- Type in your subject and then pick a cool font and whatever size you want ( I think the bigger size looks better) put it in a corresponding color 

Print it out and enjoy!  It looks great with corresponding colored binders.  
I hope you enjoyed this DIY Tutorial!  Please follow me on Tumblr for more fun and fashionable tutorials and etc.  Please inbox me on Tumblr if you have more questions, I will be more than happy to answer any questions or concerns you may have.  Also inbox my Tumblr to let me know if a video tutorial would be more helpful, and let me know ANY other tutorials, DIY, room tour, closet tour, organizational tips, lilly jurnal tour/organization tips, or anything else you all might like.

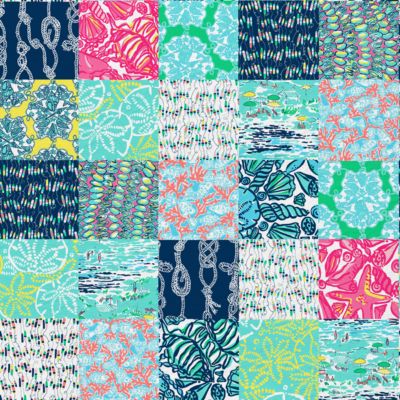
Below you will find all of the patterns that I used PLUS a few more that I like :)
please note that I do not have the rights or take credit for any of the following photographs. 


Enjoy!
xoxo,
aLl

Monday, June 24, 2013

Spirit Jersey Love

So lately I have become completely obsessed with "Spirit Jerseys"! I own 2 spirit jerseys, both in a size M. I own a yellow one in the color "lemonade" from Southern Shirt Company & I own a red one from Marley Lilly. 
I took some pictures showing you the back and the emblem on the front left chest. I do hope to order a blue one soon & keep my collection growing for those lazy college school days! 
Here ya go! 
My one in "lemonade" from Southern Shirt Co.
{{the back}}
{{the front}}
{{close-up of the emblem}}
Now here is the jersey from Marley Lilly!
{{the back}} 
{{the front}}
{{the front emblem, which is my monogram!}}
Hope you enjoy! I would recommend for everyone to have at least one! It might be summer here in Florida, but I've still been wearing it around the house! They're great for the fall and winter with leggings and boots or tennis shoes. They are so comfy! At my school's orientation I saw at least 5 girls wearing them & it was 90 degrees in MS. 
They are one of my new must-haves for surviving college! They are comfortable and colorful!  **Keep in mind that they are supposed to be a little large. Mine cover my bottom (so that shows how long it is).
Hope you liked this post! 
Comment any more reviews you'd like!
Xoxo,
aLl

Sunday, February 17, 2013

Sunday in the South

I have started doing Southern Sundays & T-Shirt Saturdays on my Instagram! My account is lexlillay. Anywho, I decided to share the post from the past two Southern Sundays & one T-Shirt Saturday

Here they are (:


Enjoy!
Xoxo, aLl


Wednesday, January 23, 2013

DIY: hair ties


I first bought my first "emijay" hair ties in November 2011, before I left on a trip to Jamaica. I made my first DIY ones back in August 2012, and now I have elastic stocked up, so that I can make a few more on days I am home sick. Today I am home sick, and so I finally decided to do a post on them. Not only do I love the colors of the hair ties, but I love that they don't tug at my hair and damage it. also, they look pretty cute on your wrists when you aren't wearing them in your hair.


I purchased a few yards of fold over elastic (which can be purchased at a fabric store). one yard will produce three hair ties. cut the elastic into 12 inch strips and knot the ends (and trim the ends after doing so if you so desire). I got regular fold over elastic, glitter, and velvet.


The process is quite easy, just hold the two ends of the elastic together and wrap them around one finger. Pull the two ends through the loop. It is just like tying the end of a balloon! To stop the fabric from fraying, slightly burn the edges with a lighter. It is an extremely easy DIY & way way way cheaper than buying them at a boutique.

Enjoy!

xoxo,

aLl

Saturday, January 5, 2013

DIY Frat Shirt

Hi everyone!
So I have been obsessed with Pinterest since I first made one over a year ago. Once I started seeing these mixed-match shirts & pockets, I fell in love. And once the shirts starting popping up, I found a link to the site. The frat collection. I have recently bought a few frat collection shirts, but kept thinking to myself about how much cheaper it would be to make my own. The other day, I went to JoAnns fabric store and bought the fabric & shirts. All for about $7. Tonight I had my boyfriend's mother help me measure the pocket and sew it on. Here are the directions:

1.) Buy the shirt & fabric. (You don't need much) I bought half a yard.

2.) Iron the shirt & the fabric.

3.) Find a shirt that already has a pocket, and take some cardstock and measure around the pocket leaving about a 1/2" extra on all sides.

4.) Take the cardstock & put it over the fabric and cut around the paper. Fold over the 1/2" on all sides and iron down, this helps the sewing process. You want to have an overlap of fabric to fold over, so the edges are clean and near.

5.) Once you have the pocket cut out and have ironed the edges over, take some pins and pin the pocket on the shirt wherever you like. I put the shirt on and looked in the mirror and pinned the pocket on that way. It might not be right the first time, I think I moved the pocket a good 3 times before it was in the perfect spot.


6.) Then use your choice of thread & sew the pocket on your shirt. Since my pocket was mint green, I used mint green thread.

7.) Once you have sewn on the pocket, you now have a super cute & super cheap DIY version of a frat collection shirt.


Here are the pictures of the process & the final product! It was extremely easy to make and only took about 20-30 minutes.

GOODLUCK!

aLl